
4. Templates and Static Media
In this chapter, we’ll be extending your knowledge of Django by introducing you to the template engine as well as how to serve static media within your web pages.
4.1. Using Templates
Up to this point, you have plugged a few things together to create a Django-powered webpage. This is coupled a view, which is in turn coupled with a series of URL mappings. Here we will delve into how to combine templates into the mix.
Well-designed websites use a lot of repetition in their structure or layout. Whether you see a common header or footer on a website’s pages, the repetition of page layouts aids users with navigation, promotes organisation of the website and reinforces a sense of continuity. Django provides templates to make it easier for developers to achieve this design goal, as well as separating application logic from presentational concerns. In this chapter, you’ll create a basic template which will be used to create a HTML page. This template will then be dispatched via a Django view. In Chapter 6, we will take this a step further by using templates in conjunction with models to dispatch dynamically generated data.
4.1.1. Configuring the Templates Directory
To get templates up and running, you will need to setup a directory in which template files are stored.
In your Django project’s directory (e.g. <workspace>/tango_with_django_project/), create a new directory called templates. Within the new templates directory, create another directory called rango. So the directory <workspace>/tango_with_django_project/templates/rango/ will be the location in which we will be storing templates associated with our rango application.
To tell your Django project where the templates will be housed, open your project’s settings.py file. Find the tuple TEMPLATE_DIRS and add in the path to your newly created templates directory, so it looks like the following example.
TEMPLATE_DIRS = (
    # Put strings here, like "/home/html/django_templates" or "C:/www/django/templates".
    # Always use forward slashes, even on Windows.
    # Don't forget to use absolute paths, not relative paths.
    '<workspace>/tango_with_django_project/templates/',
)
Note that you are required to use absolute paths to locate the templates directory. If you are part of a team or working on different computers, this may become a problem in the future. You’ll have different usernames, meaning different paths to your <workspace> directory. The hard-coded path you entered above would not be the same on different computers. Of course, you could add in the template directory for each different setup, but that would be a pretty nasty way to tackle the problem. So, what can we do?
Warning
The road to hell is paved with hard-coded paths. Hard-coding paths is considered to be a software engineering anti-pattern, and will make your project less portable.
4.1.2. Dynamic Paths
The solution to the problem of hard-coding paths is to make use of built-in Python functions to work out the path of our templates directory automatically for us. This way, an absolute path can be obtained regardless of where you place your Django project’s code on your filesystem. This in turn means that your project’s code becomes more portable. At the expense of a little bit more complexity in setting up your Django project now, you can make your life much easier later on. No pain, no gain!
To start, modify the settings.py file to include a variable called SETTINGS_DIR. This will store the path to the directory in which your project’s settings.py module will be contained. This is obtained by using the special Python __file__ attribute, which is set to the absolute path of your settings module. We then take the absolute path to the settings file, extracting the path to the directory in which the settings module is contained. For example, calling os.path.dirname() on the absolute path of <workspace>/tango_with_django_project/tango_with_django_project/settings.py would yield a directory of <workspace>/tango_with_django_project/tango_with_django_project/.
To implement this functionality, add the following code to the top of settings.py. Note the importing of the os module.
import os
SETTINGS_DIR = os.path.dirname(__file__)
Now that we have the absolute path to our project’s configuration directory, we need to get the root directory of our project. This is exactly one level up from the project configuration directory. We can therefore make use of the pardir string within the Python os module to help us obtain the path to the parent directory. A project configuration directory path of <workspace>/tango_with_django_project/tango_with_django_project/ would for example return the path <workspace>/tango_with_django_project/.
Add the following two lines to settings.py directly underneath what you entered above.
PROJECT_PATH = os.path.join(SETTINGS_DIR, os.pardir)
PROJECT_PATH = os.path.abspath(PROJECT_PATH)
First, we use the os.path.join() function to join together our SETTINGS_DIR variable and the os.pardir string.
Typically, this will return <workspace>/tango_with_django_project/tango_with_django_project/... Calling os.path.abspath() on that path will then yield the absolute path to the next directory up the hierarchy, which would be <workspace>/tango_with_django_project/ in our example. In other words, PROJECT_PATH now contains the absolute path to our Django project’s root. We can then use this path to point to special directories in our project, such as the directory which stores our templates!
Warning
When joining or concatenating system paths together, using os.path.join() is the preferred approach. Using this function ensures that the correct slashes are used depending on your operating system. On a POSIX-compatible operating system, forward slashes would be used to separate directories, whereas a Windows operating system would use backward slashes. If you manually append slashes to paths, you may end up with path errors when attempting to run your code on a different operating system.
Let’s make use of it now. Create a new variable in settings.py called TEMPLATE_PATH and store the path to the templates directory you created earlier. Using the os.path.join() function, your code should look like the following example.
TEMPLATE_PATH = os.path.join(PROJECT_PATH, 'templates')
We again make use of os.path.join() to mash together the PROJECT_PATH variable and 'templates', which would for example yield <workspace>/tango_with_django_project/templates/. We can then replace the hard-coded path we put in the TEMPLATE_DIRS tuple earlier with TEMPLATE_PATH, just like in the example below.
TEMPLATE_DIRS = (
    # Put strings here, like "/home/html/django_templates" or "C:/www/django/templates".
    # Always use forward slashes, even on Windows.
    # Don't forget to use absolute paths, not relative paths.
    TEMPLATE_PATH,
)
We can keep the TEMPLATE_PATH variable at the top of our settings.py module to make it easy to access should it ever need to be changed. This is why we created an additional variable to store the template path.
4.1.3. Adding a Template
With your template directory and path set up, create a file called index.html and place it in the templates/rango/ directory. Within this new file, add the following HTML code:
<!DOCTYPE html>
<html>

    <head>
        <title>Rango</title>
    </head>

    <body>
        <h1>Rango says...</h1>
        hello world! <strong>{{ boldmessage }}</strong><br />
        <a href="/rango/about/">About</a><br />
    </body>

</html>
From this HTML code, it should be clear that a simple HTML page is going to be generated that greets a user with a hello world message. You might also notice some non-HTML in the form of {{ boldmessage }}. This is a Django template variable, and we will be able to set a value for this variable to be displayed within the rendered output. We’ll get to that in a moment.
To use this template, we need to re-configure the index() view that we created earlier. Instead of dispatching a simple message, we will change it to dispatch our template.
In rango/views.py, add the following import statements at the top of the file.
from django.template import RequestContext
from django.shortcuts import render_to_response
You can then update the index() view function as follows. Check out the inline commentary to see what each line does.
def index(request):
    # Request the context of the request.
    # The context contains information such as the client's machine details, for example.
    context = RequestContext(request)

    # Construct a dictionary to pass to the template engine as its context.
    # Note the key boldmessage is the same as {{ boldmessage }} in the template!
    context_dict = {'boldmessage': "I am bold font from the context"}

    # Return a rendered response to send to the client.
    # We make use of the shortcut function to make our lives easier.
    # Note that the first parameter is the template we wish to use.
    return render_to_response('rango/index.html', context_dict, context)
In our updated view, we use the RequestContext class to gain access to settings related to the user’s request. We then create a dictionary to store any data we want to send through to the template, then finally call the render_to_response() helper function. We pass as parameters the template we wish to use, the dictionary with our template variables, and the context we obtained from the user’s request. The render_to_response() function will take this data and mash it together with the template to produce a complete HTML page. This is then returned and dispatched to the user’s web browser.
When a template file is loaded with the Django templating system, a template context is created. In simple terms, a template context is essentially a Python dictionary that maps template variable names with Python variables. In the template we created earlier, we included a template variable name called boldmessage. In our index(request) view example, the string I am bold font from the context is mapped to template variable boldmessage. The string I am bold font from the context therefore replaces any instance of {{ boldmessage }} within the template.
Now that you have updated the view to employ the use of your template, run the Django development server and visit http://127.0.0.1:8000/rango/. You should see your template rendered in all its glory, just like the example shown in Figure 1.
If you don’t, read the error message presented to see what the problem is, and then double check all the changes that you have made. Ensure that all the changes required have been made. One of the most common issues people have with templates is that the path is set incorrectly in settings.py. Sometimes it’s worth adding a print statement to settings.py to report the PROJECT_PATH and TEMPLATE_PATH.
This example demonstrates how to use templates within your views. However, we have only touched upon some of the functionality provided by Django regarding templates. We will use templates in more sophisticated ways as we progress through this tutorial. In the meantime, you can find out more about templates from the official Django documentation.
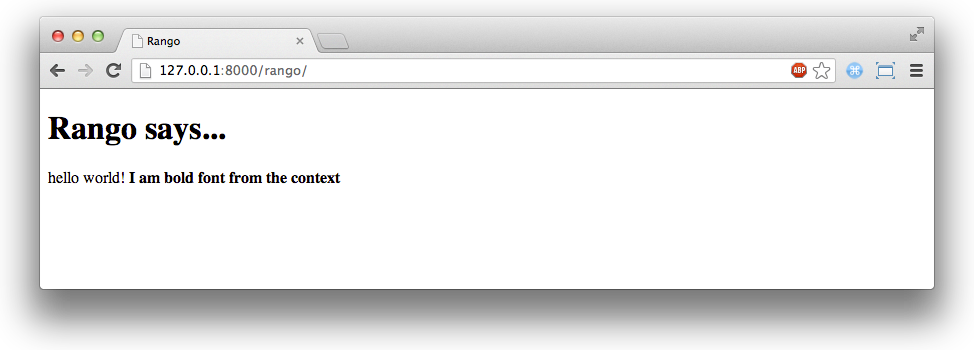
Figure 1: A screenshot of Google Chrome rendering the template used with this tutorial.
4.2. Serving Static Media
Admittedly, the Rango website is pretty plain as we have not included any styling or imagery. Cascading Style Sheets (CSS), JavaScript and images are essentially static media files which we can include in our webpages to add style and introduce dynamic behaviour. These files are served in a slightly different way from webpages. This is because they aren’t generated on the fly like our HTML pages. This section shows you how to setup your Django project to serve static media to the client. We’ll also modify our template to include some example static media.
4.2.1. Configuring the Static Media Directory
To get static media up and running, you will need to set up a directory in which static media files are stored. In your project directory (e.g. <workspace>/tango_with_django_project/), create a new directory called static.
Now place an image within the static directory. As shown in Figure 2, we chose a picture of the chameleon, Rango - a fitting mascot, if ever there was one.
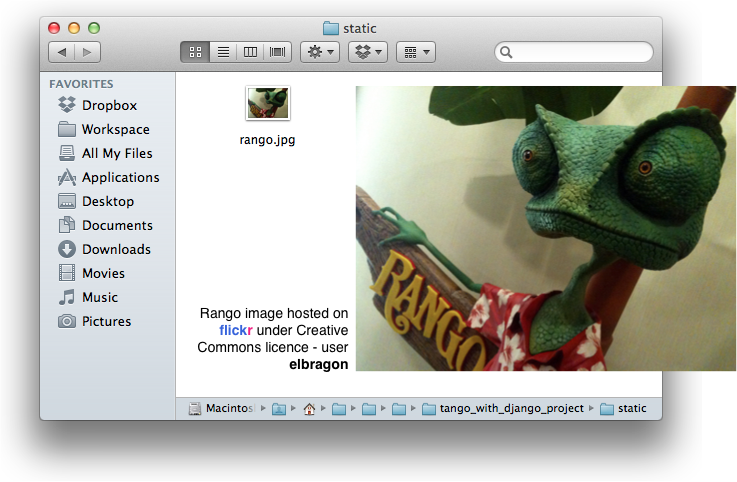
Figure 2: Rango the chameleon within our static media directory.
With our static directory created, we need to tell Django about it, just like we did with our templates directory earlier. In settings.py file, we need to update two variables: STATIC_URL and the STATICFILES_DIRS tuple. First, create a variable to store the path to the static directory (STATIC_PATH) as follows.
STATIC_PATH = os.path.join(PROJECT_PATH,'static')

STATIC_URL = '/static/' # You may find this is already defined as such.

STATICFILES_DIRS = (
    STATIC_PATH,
)
You’ve typed in some code, but what does it represent? The first variable STATIC_URL defines the base URL with which your Django applications will find static media files when the server is running. For example, when running the Django development server with STATIC_URL set to /static/ like in the code example above, static media will be available at http://127.0.0.1:8000/static/. The official documentation on serving up static media warns that it is vitally important to make sure that those slashes are there. Not configuring this problem can lead to a world of pain.
While STATIC_URL defines the URL to access media via the web server, STATICFILES_DIRS allows you to specify the location of the newly created static directory on your local disk. Just like the TEMPLATE_DIRS tuple, STATICFILES_DIRS requires an absolute path to the static directory. Here, we re-used the PROJECT_PATH defined in Section 4.1 to create the STATIC_PATH.
With those two settings updated, run your Django project’s development server once more. If we want to view our image of Rango, visit the URL http://127.0.0.1:8000/static/rango.jpg. If it doesn’t appear, you will want to check to see if everything has been correctly spelt and that you saved your settings.py file, and restart the development server. If it does appear, try putting in additional file types into the static directory and request them via your browser.
Caution
While using the Django development server to serve your static media files is fine for a development environment, it’s highly unsuitable for a production - or live - environment. The official Django documentation on Deployment provides further information about deploying static files in a production environment.
4.3. Static Media Files and Templates
Now that you have your Django project set up to handle static media, you can now access such media within your templates.
To demonstrate how to include static media, open up index.html located in the <workspace>/templates/rango/ directory. Modify the HTML source code as follows. The two lines that we add are shown with a HTML comment next to them for easy identification.
<!DOCTYPE html>

{% load static %} <!-- New line -->

<html>

    <head>
        <title>Rango</title>
    </head>

    <body>
        <h1>Rango says...</h1>
        hello world! <strong>{{ boldmessage }}</strong><br />
        <a href="/rango/about/">About</a><br />
        <img src="{% static "rango.jpg" %}" alt="Picture of Rango" /> <!-- New line -->
    </body>

</html>
First, we need to inform Django’s template system that we will be using static media with the {% load static %} tag. This allows us to call the static template tag as done in {% static "rango.jpg" %}. As you can see, Django template tags are denoted by curly brackets { }. In this example, the static tag will combine the STATIC_URL with "rango.jpg" so that the rendered HTML looks like the following.
<img src="/static/rango.jpg" alt="Picture of Rango" /> <!-- New line -->
If for some reason the image cannot be loaded, it is always nice to specify an alternative text tagline. This is what the alt attribute provides - the text here is used in the event the image fails to load.
With these minor changes in place, kick off the Django development server once more and visit http://127.0.0.1:8000/rango. Hopefully, you will see web page something like the one shown in Figure 3.

Figure 3: Our first Rango template, complete with a picture of Rango the chameleon.
The {% static %} function call should be used whenever you wish to reference static media within a template. The code example below demonstrates how you could include JavaScript, CSS and images into your templates - all with the correct HTML markup.
<!DOCTYPE html>

{% load static %}

<html>

    <head>
        <title>Rango</title>
        <link rel="stylesheet" href="{% static "css/base.css" %}" /> <!-- CSS -->
        <script src="{% static "js/jquery.js" %}"></script> <!-- JavaScript -->
    </head>

    <body>
        <h1>Including Static Media</h1>
        <img src="{% static "rango.jpg" %}" alt="Picture of Rango" /> <!-- Images -->
    </body>

</html>
Static files you reference will obviously need to be present within your static directory. If the file is not there or you have referenced it incorrectly, the console output provide by Django’s lightweight development server will flag up any errors. Try referencing a non-existent file and see what happens.
For further information about including static media you can read through the official Django documentation on working with static files in templates.
Caution
Care should be taken in your templates to ensure that any document type declaration (e.g. <!DOCTYPE html>) you use in your webpages appears in the rendered output on the first line. This is why we put the Django template command {% load static %} on a line underneath the document type declaration, rather than at the very top. It is a requirement of HTML/XHTML variations that the document type declaration be declared on the very first line. Django commands placed before will obviously be removed in the final rendered output, but they may leave behind residual whitespace which means your output will fail validation on the W3C markup validation service.
4.4. The Static Media Server
Now that you can dispatch static files, let’s look at uploading media. Many websites provide their users with the ability to do this - for example, to upload a profile image. This section shows you how to add a simple development media server to your Django project. The development media server can be used in conjunction with file uploading forms which we will touch upon in Chapter 8.
So, how do we go about setting up a development media server? The first step is to create another new directory called media within our Django project’s root (e.g. <workspace>/tango_with_django_project/). The new media directory should now be sitting alongside your templates and static directories. After you create the directory, you must then modify your Django project’s urls.py file, located in the project configuration directory (e.g. <workspace>/tango_with_django_project/tango_with_django_project/). Add the following code to the urls.py file.
# At the top of your urls.py file, add the following line:
from django.conf import settings

# UNDERNEATH your urlpatterns definition, add the following two lines:
if settings.DEBUG:
        urlpatterns += patterns(
                'django.views.static',
                (r'media/(?P<path>.*)',
                'serve',
                {'document_root': settings.MEDIA_ROOT}), )
The settings module from django.conf allows us access to the variables defined within our project’s settings.py file. The conditional statement then checks if the Django project is being run in DEBUG mode. If the project’s DEBUG setting is set to True, then an additional URL matching pattern is appended to the urlpatterns tuple. The pattern states that for any file requested with a URL starting with media/, the request will be passed to the django.views.static view. This view handles the dispatching of uploaded media files for you.
With your urls.py file updated, we now need to modify our project’s settings.py file. We now need to set the values of two variables. In your file, find MEDIA_URL and MEDIA_ROOT, setting them to the values as shown below.
MEDIA_URL = '/media/'
MEDIA_ROOT = os.path.join(PROJECT_PATH, 'media') # Absolute path to the media directory
The first variable MEDIA_URL defines the base URL from which all media files will be accessible on your development server. Setting the MEDIA_URL for example to /media/ will mean that user uploaded files will be available from the URL http://127.0.0.1:8000/media/. MEDIA_ROOT is used to tell Django where uploaded files should be stored on your local disk. In the example above, we set this variable to the result of joining our PROJECT_PATH variable defined in Section 4.1 with /media/. This gives an absolute path of <workspace>/tango_with_django_project/media/.
Caution
As previously mentioned, the development media server supplied with Django is very useful for debugging purposes. However, it should not be used in a production environment. The official Django documentation on static files warns that such an approach is “grossly inefficient and insecure”. If you do come to deploying your Django project, read the documentation to see an alternative solution for file uploading that can handle a high volume of requests in a much more secure manner.
You can test this setup works by placing an image file in your newly created media directory. Drop the file in, start the Django development server, and request the image in your browser. For example, if you added the file rango.jpg to media, the URL you should enter would look like http://127.0.0.1:8000/media/rango.jpg. The image should show in your browser. If it doesn’t, you’ll need to go back and check your setup.
4.5. Basic Workflow
With the chapter complete, you should now know how to setup and create templates, use templates within your views, setup and use Django to send static media files, include images within your templates and setup Django’s static media server to allow for file uploads. We’ve actually covered quite a lot!
Creating a template and integrating it within a Django view is a key concept for you to understand. It takes several steps, but becomes second nature to you after a few attempts.
- First, create the template you wish to use and save it within the
templatesdirectory you specified in your project’ssettings.pyfile. You may wish to use Django template variables (e.g.{{ variable_name }}) within your template. You’ll be able to replace these with whatever you like within the corresponding view. - Find or create a new view within an application’s
views.pyfile. - Add your view-specific logic (if you have any) to the view. For example, this may involve extracting data from a database.
- Within the view, construct a dictionary object which you can pass to the template engine as part of the template’s context.
- Make use of the
RequestContext()class andrender_to_response()helper function to generate the rendered response. Ensure you reference the correct template file for the firstrender_to_response()parameter! - If you haven’t already done so, map the view to a URL by modifying your project’s
urls.pyfile - and the application-specificurls.pyfile if you have one.
The steps involved for getting a static media file onto one of your pages is another important process you should be familiar with. Check out the steps below on how to do this.
- Take the static media file you wish to use and place it within your project’s
staticdirectory. This is the directory you specify in your project’sSTATICFILES_DIRStuple withinsettings.py. - Add a reference to the static media file to a template. For example, an image would be inserted into an HTML page through the use of the
<img />tag. Remember to use the{% load static %}and{% static "filename" %}commands within the template to make your life easier! - Load the view that utilises the template you modified in your browser. Your static media should appear.
The next chapter will look at databases. We’ll see how to make use of Django’s excellent database layer to make your life easier and SQL free!
4.6. Exercises
Give the following exercises a go to reinforce what you’ve learnt from this chapter.
- Convert the about page to use a template too from a template called
about.html. - Within the
about.htmltemplate, add a picture stored within your project’s static media.